http://www.good-win-racing.com/Mazda-Performance-Part/30-1132RFBF.html?gclid=CKHjruDj_dQCFUtNfgodPkME9w
couple of videos i found useful (sort of)
https://www.youtube.com/watch?v=76TDdLHXebA&t=633s
https://www.youtube.com/watch?v=2cxi3YmecRA
https://www.miata.net/hakuna/shavebadge.html
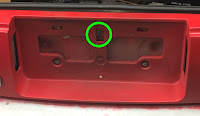
Original panel was cracked (joys of street street parking) so was not worried about being careful during removal. Only part to watch out for is after removing all the nuts, and fasteners, lift up as there is a slot in the top center of the license plate area (green circle).

Couple of items not mentioned in various reference materials
 I was having a hard time removing the white electrical connector (left). Figured out you do not need to, simply remove the turn signal light (grey) .
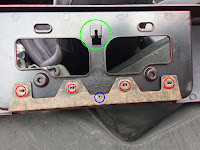
The original rear finish panel has a metal stiffener plate on the back side. It is held on by four pinch washers that attach to short posts (red circles) and one rivet (blue circle). I removed from the old panel and installed on the new one.
The green circle shows the back side of the slot that requires you to lift up for removal and push down (gently) for installation.
 1/8 in diameter rivet. had to drill the old one out.
miata badge - used fishing line to cut through two sided tape (patience)
mazda badge - two posts are held in place by caulk/glue. from the back, used a drill bit to work the posts free. on the new panel, drilled 1/8 inch holes to secure the posts on the badge.

Used Dupli-Color BGM0398 Bright Red General Motors Exact-Match
1st time using "rattle can". Did not prep the panel and was very happy with the result. take your time and use an enclosed space (i..e garage) to avoid small particles floating in the wind.
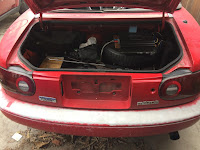
The panel is slightly off center on the horizontal axis. About 1/4 inch. read others had the same issue. probably could have drilled out the center slot (green circle above) to provide some adjustment. Only noticeable up close in two places if you are looking for it. Gap below the driver side tail light and the key hole is slightly off center.
overall very happy with the result. now I do need to get after repainting the bumper.....
overall very happy with the result. now I do need to get after repainting the bumper.....

No comments:
Post a Comment