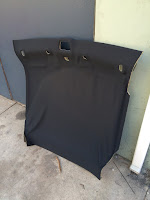
I removed and replaced the headliner section and had an upholstery shop replace the actual liner for $150. For me it made sense (at the time) to have someone else mess with preparing the surface (remove old foam), applying the glue, and getting the contours fitted properly.
Looking back, it was not that difficult but not sure how much i saved by doing the remove/replace labor myself. It is a tight fit getting the headliner out so need to take your time as easy to scratch the pillars.
two helpful you tube videos.
https://youtu.be/iZHIeiUFXJg
https://youtu.be/HZVlMKG3UKo (before you complain about the video quality, try taking video yourself while performing this procedure)
Hardest part by far was separating the A and C pillars. everything else was easy.
 |
| looking towards the back, |
 |
| looking down |
 this was the hardest part. separating the 3 tabs connecting the A and C pillars. Although I took out the light, I did not need to as there is enough play in the wire. circle 4 is the one fastener I did unhook to prove enough play to allow a pillar trim to slide past c pillar trim. it looked a little tight in the video where they did not remove it.
 this is a view of the 3 fasteners on the A pillar trim piece that connects with the C pillar trim piece. bottom of the picture is also bottom of the trim piece. looking at inside of drivers side piece.
once C pillar trim piece was loose, pulled the A pillar trim away from the car at each slot starting with the one closest to the back of the car. careful with position 5. need to pull away from the car but also, once loose pull trim piece towards the back of the car so as not to damage the tab on the end.
5 slots where the A pillar fasteners line up
 drivers side A pillar trim with location of fasteners. on both sides, the fastener in position 5 stayed on the frame. used needle nosed pliers to extract and fit back onto trim piece. nothing broken.
after A pillars, removed sun visors, light, and garage door remote.

for sun visor, remove plastic cover then unscrew.

on the clip. pull down the plastic cover to reveal screw.

for the light, two tabs at the front. you do not need to disconnect the wires as assembly fits through the opening
tabs for the garage remote are on each side. no need to remove wires as assembly fits through the opening

 removal/replacement. pushed both the light and garage door opener through the headliner and was able to slide out the passenger side door.
 would have been easier with a helper during replacement.


No comments:
Post a Comment