Sunday, May 2, 2021

DIY - Battery Plug for Apple Wireless Bluetooth Keyboard A1314

I got the Apple Wireless Bluetooth Keyboard A1314 keyboard for free then noticed it was missing the end cap for the battery compartment.

readers digest version - made a plastic 5/8" bolt from some instaMold I had and a 5/8" nut. used aluminum foil to complete the circuit.  still a work in progress but functional. 

while I will probably 'splurge' for a new end cap online at some point, this turned into an opportunity to try out the instaMold I have had for a long time but never opened.


details

-Before proceeding, I wanted to know if the keyboard worked.  Put in 2 fresh AA batteries with a small piece of tin foil to connect the circuit between the end of the battery and the inside wall of the battery compartment.  Used my pinky finger to compress in the batteries and complete the circuit.  It worked.

- first step was to determine the thread size.  I did some initial queries on line that seemed to narrow it down to 5/8".  Went to local hardware store, with keyboard, to verify 5/8" bolt would fit.  Gently as the threads are aluminum.  Verified 5/8".  

- I was hoping they had a nylon 5/8" bolt that I could dremel but all they had was Zinc 1 1/2 in length and that was way too heavy and long, even for a prototype.

- Decided to try to make one using instaMold since operating environmentwill be benign

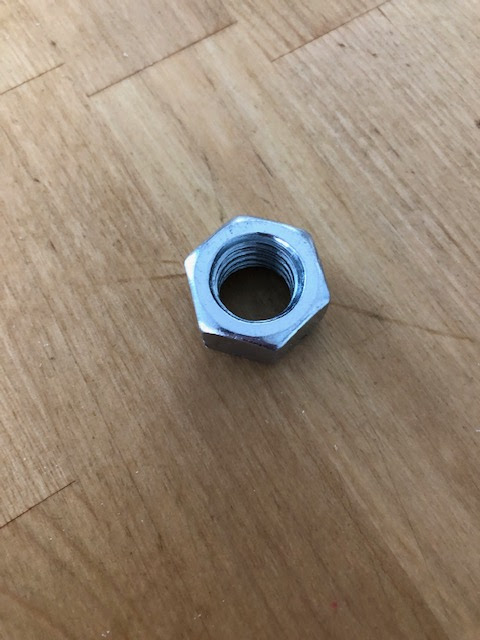
- Used a 5/8" nut as a mold and coated inside with some vegetable oil.


- Used about a tablespoon of the plastic beads.  That was 2x what I needed.

- pressed the softened plastic into the nut then used a coin (quarter) to create a slot on one side.   

- only minor issue was I was not paying close attention and some of the plastic formed to the outside of the nut and had to be trimmed in order to back out the plastic bolt.

- the width of the nut is 2x what is needed so will need to be trimmed if trying to make it flush

- after inserting the 2 AA batteries (positive end towards the middle) I cut a couple of small pieces of tin foil and placed on the negative end of the last battery making sure some of the aluminum touched the inside of the cylinder.  This is needed to complete the circuit.  trying to put it on the thread of the plastic bolt does not work due to the tolerances.

- result is ugly but functional until I get around to creating an amazon order over $25 so I get free shipping


Things to pay attention to or try if there is a next time


- length of bolt.  I pushed the softened plastic all the way into the nut with the nut laying flat on a countertop.  this made sure the plastic conformed to the threads and also had a flat end.   It also resulted in a bolt that was 2x too long.  Could try and cut the bolt via dremel or and insert a metal bolt in one end to shorten the effective width of the nut and therefore the length of the bolt. while I don't think having a flat end is critical, i would be concerned that only trying to push the plastic half way would not get plastic to conform properly to the nut threads.

- as you can rework the plastic easily by just reheating, I would create the thread part first with a simple handle to unscrew the bolt from the nut.  then reheat just the top part to create the slot.  


Friday, March 26, 2021

Miata NA Seat Reupholstery

After 30 years & 241K miles time was time to deal with the deteriorated cloth seats.  

The youtube video on replacing the seat with leather was great and inspired me but  wanted to stay with cloth and did not see anything on line that was basically a oem replalcement.   Passenger side was actually not too bad.  Drivers side had ripped fabric in multiple places and foam showing. 

https://www.youtube.com/watch?v=_mi1HVCnRv0


Short version
- went to a local shop and they did an amazing job for $700.  
- As they did not have an exact color match, I chose "Ascot'  as wanted something a little unique 
- Included zippers in the headrest, foam where needed and back pocket on passenger side so essentially OEM except for the color.
- Very satisfied and no regrets not trying to DIY.  
- Only 'issue' is the brand new seats accentuate the faded black interior


Details

In talking with local upholstery shops - two options
1 - One wanted me to order the replacement covers and they would install
2 - The other would do it all

The latter was highly recommended from multiple sources and only $100 more expensive.
Since I was able to see the fabric and color scheme in person my comfort level was much higher than ordering on line.  In addition I couldn't find any cloth on line so I went with the local shop do it all option.

Color decision.  They did not have an 'exact' replacement so what ever I chose would be a "one off'. 
- Dark Grey, Steel and Slate were 'safe' choices but decided if it was going to be different might as well make it unique. 


Friday, February 26, 2021

Miata NA Shifter rebuild

 91 miata - 241K miles.  1st time doing the procedure

- very straightforward and not difficult.  everything is easily accessible. 45 minutes including taking pictures.  i did spend an hour looking at various you tube videos ahead of time.

- lots of good you tube videos I found this one to be the most helpful


Short version

 https://www.youtube.com/watch?v=53Vz15GdKd0

- also this writeup from the miata.net https://forum.miata.net/vb/showthread.php?p=8041867

- get a kit.  In addition to both upper and lower dust boots having failed, the two 'wavy' washers were toast, the plastic guide was chipped and and nylon cup was missing.

Details

As the above video & write up are comprehensive will just provide some highlights

- i went with moss miata kit ($90).  ordered monday and showed up thursday. .  Only minor complaint is the upper boot dust cover did not have metal reinforcement for the 4 10mm bolts.  it was just rubber while their picture showed the miata OEM part with the metal reinforcement.  

- my shift knob was on tight and could not budge by hand. had to wrap with towel and use a pipe wrench to loosen

- I used a small amount of liquid dishwashing soap (vice grease or vaseline) on the shifter shaft to remove/install the boot covers.

- The shifter came out of the turret easily although the nylon cup at the end was missing.  Could not see it in the turret after removing the oil so who knows what happened to it? 

- Oil was at the fill line but definitely needed to be replaced.  went with 80W-90 gear oil. $7 for a quart at local O'reilly's. 


- i used a pump from a $1 liquid soap dispenser to pump out the oil.

- The turkey baster I had was not able to get in deep enough into the turret.


- Both 'wavy' washers were toast.  The upper one was in three pieces that thankfully came apart after removal of the shifter assembly.

-The lower one (attached to the bushing in the turret) was cracked. This was not evident until after removing the bushing.


- the plastic guide was chipped at the top.


- i left it in neutral and it seated on 2nd try. i installed the lower dust cover afterwards.

- i used a small amount of liquid soap on the gear shift as lubrication when putting on the boot covers (vice vaseline or grease)


Monday, January 11, 2021

NVIDIA ASUS 750 ti HDMI port not providing signal to Dell 4K monitor

My Dell 4K monitor was not getting a signal from my ASUS NVIDIA 750 ti graphics card.

Wound up buying a dual link HDMI (f) to DVI (m) adapter ($5 at Fry's) and works great.

3480 x 2160 resolution at 60hz

Not sure the HDMI port on the graphics card ever worked.  Had been using the VGA port and the HDMI from the built in graphics on my motherboard for a dual monitor set up.  The built in board (Intel HD graphics 530) would drive the 4K monitor but only at 30 hz.

windows 10

8 gb DDR 3 memory

ASUS mobo

ASUS GeForce 750Ti graphics card

Intel i5-6500 CPU

Dell U2720Q 4K monitor.  Comes with both HDMI and Display port cables


Sunday, December 20, 2020

Failed access to a single website - modem/router troubleshooting guide

summary of issue - on or about 17 Dec 2020 I could not longer access the www.tsp.gov website from any device that was using my home network wifi (desktop, iphone, ipad) via chrome, edge or avast .  I could access the site from my phone if I turned off wifi. I had not made any changes to my modem or router and only that website was an issue. I was able to access all other websites 

following is a recap of how I resolved the issue (windows 10, spectrum cable modem, c2300 router)

1st I had to figure out where to start.  Assumed it was either website, router or ISP.  As this is a popular website and no tweets or posts about any issues on the web I decided to start with my router (TP LINK).  

TP Link reps (on a saturday) were very responsive and helped me confirm it was in fact a router issue.  This was determined by bypassing the router and connecting my desktop directly to the cable modem via ethernet.  In this configuration I could access the site. things they had me try that did not work

- change to google DNS 8.8.8.8, 8.8.4.4

- change MTU to 1400 (from 1500)

after 2 hours they were unable to resolve beyond that so plan was to escalate on monday.

I was impatient so decided to troubleshoot on my own now that i knew it was a router issue.

i connected an old linksys router to the cable modem and was able to connect with the website.

when i connected my tplink router and restored the settings from a saved file it would not work

the following worked (need to be patient for each step to complete as it can take a couple of minutes - each)

- power off both cable modem and router for at least a minute

- power on the cable modem and wait until is settles

- connect router and power on.

- hard reset of router (press and hold reset for 10 seconds)

- soft reset of cable modem (need to wait until router settles). took about 2 minutes for the internet light on router to turn from orange (no connection) to white (connection)

- log into router 

-do a fresh set up.  it did not work when i restored from saved configuration file

- i used clone MAC address 


I still have no idea about the root cause of not being able to access only the one website. 


Heater / AC Control Panel Plate - Mazda (NA01-61-C04A) replacement

 plenty of how to videos on google so just adding couple of thoughts 


amazon $32 w/ free shipping

mine was in bad shape after 29 years.  


the control knobs are held in by small phillips head screws.  i had to remove my after market radio to get at the lower two screws.  i used craftsman ph 0 x 40mm screwdriver. think about where the screw would wind up if it drops.  recommend using a towel, 


use old tooth brush to clean out the grooves


there is a clear plastic piece that comes out when you remove the old decal for fan settings.  i used goof off to clean it up.  it appears to be a light diffuser.  


'looking good billy ray'


Saturday, November 28, 2020

2011 Tomos ST Moped for sale by owner [SOLD]

SOLD


just serviced by local motorcycle shop (Kontiki in Pacific Beach CA)

carburetor, fuel filter, spark plug, oil change

low miles (~730)

30mph/100 mpg

registered w/ CA DMV

local pickup only

$700 firm